
Before you start
Have the following ready:- A user with administrator access to your VTEX dashboard.
- Your Yuno credentials, which you can find in your Yuno dashboard under Developers → API Credentials: Account ID, Public API Key, and Private Secret Key.
1
Configure Yuno as a payment provider
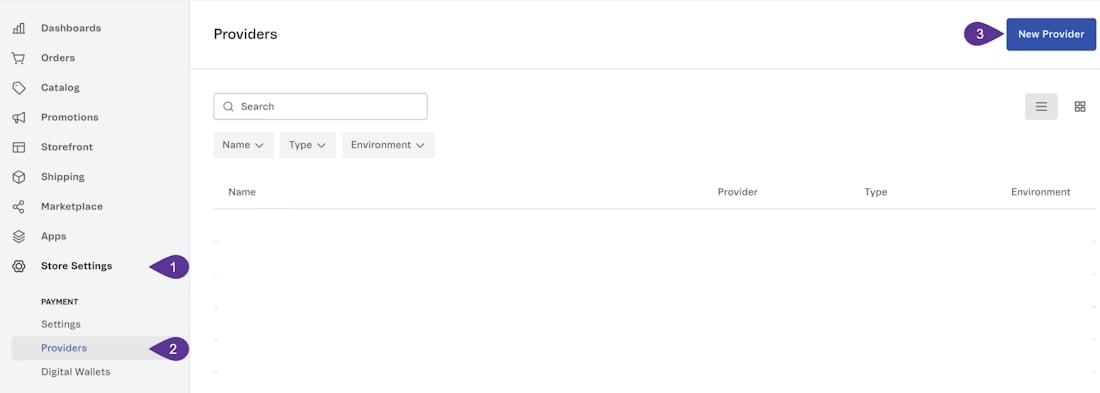
- In the VTEX dashboard, open the left-hand menu and go to Store Settings → Payment → Providers, then click New Provider at the top right.
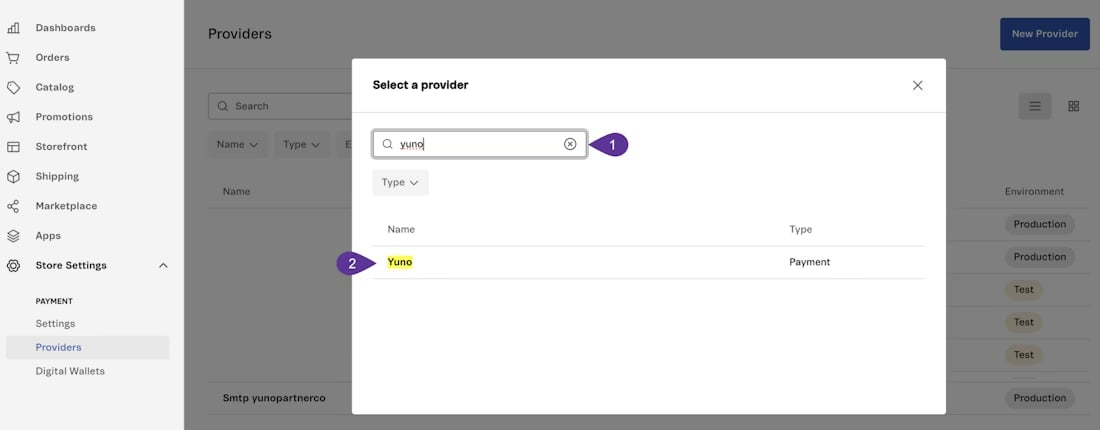
- In the Select a provider dialog, type
Yunoin the search box and select Yuno from the results.
- Fill in the provider configuration form and save. Once saved, the provider is registered, but no payment methods are active yet.
Field reference
Field reference
Settlement Options
Settlement Options
The Automatic Settlement field determines the timing of the capture for card and wallet payments.
Environments: The Yuno environment is determined by the prefix of your Public API Key:
dev_, staging_, sandbox_, or prod_.2
Install the Yuno Payment App
After saving the provider configuration, install the Yuno Payment App from your VTEX dashboard.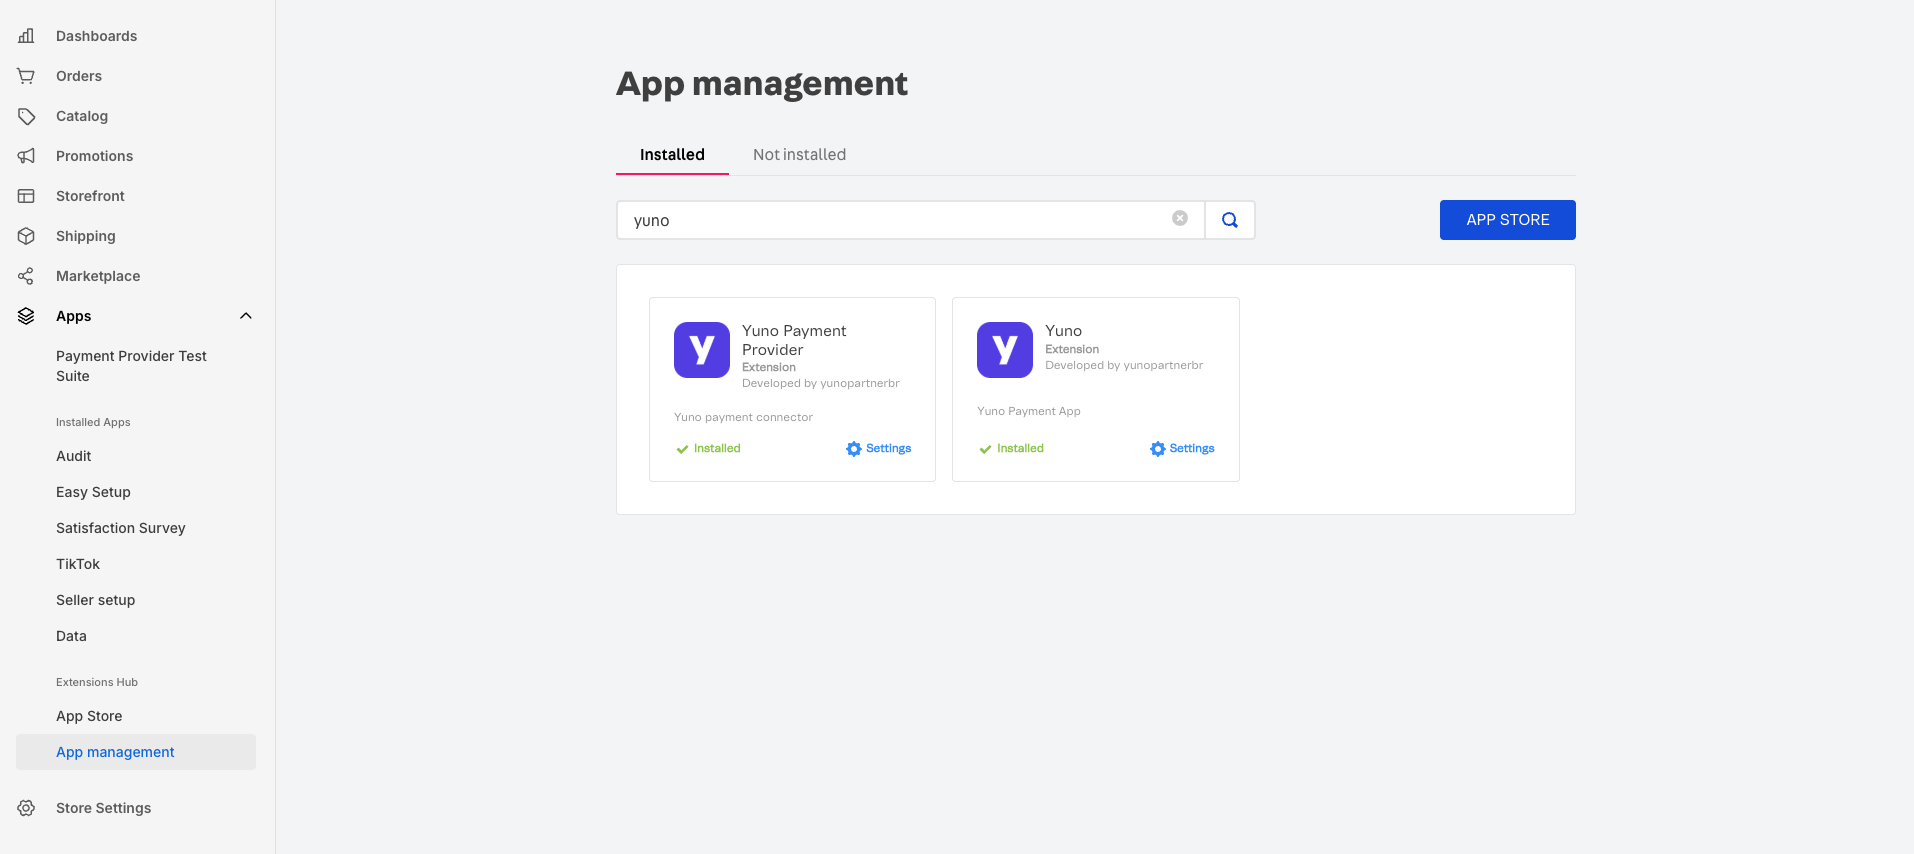
- In the VTEX dashboard, go to Apps → App Management.
- Search for Yuno and select the Yuno Payment App in the list of available apps and open its Settings.
- Click Install to complete the setup.
3
Activate payment methods
Now choose which payment methods you want to offer to your shoppers and route them through Yuno.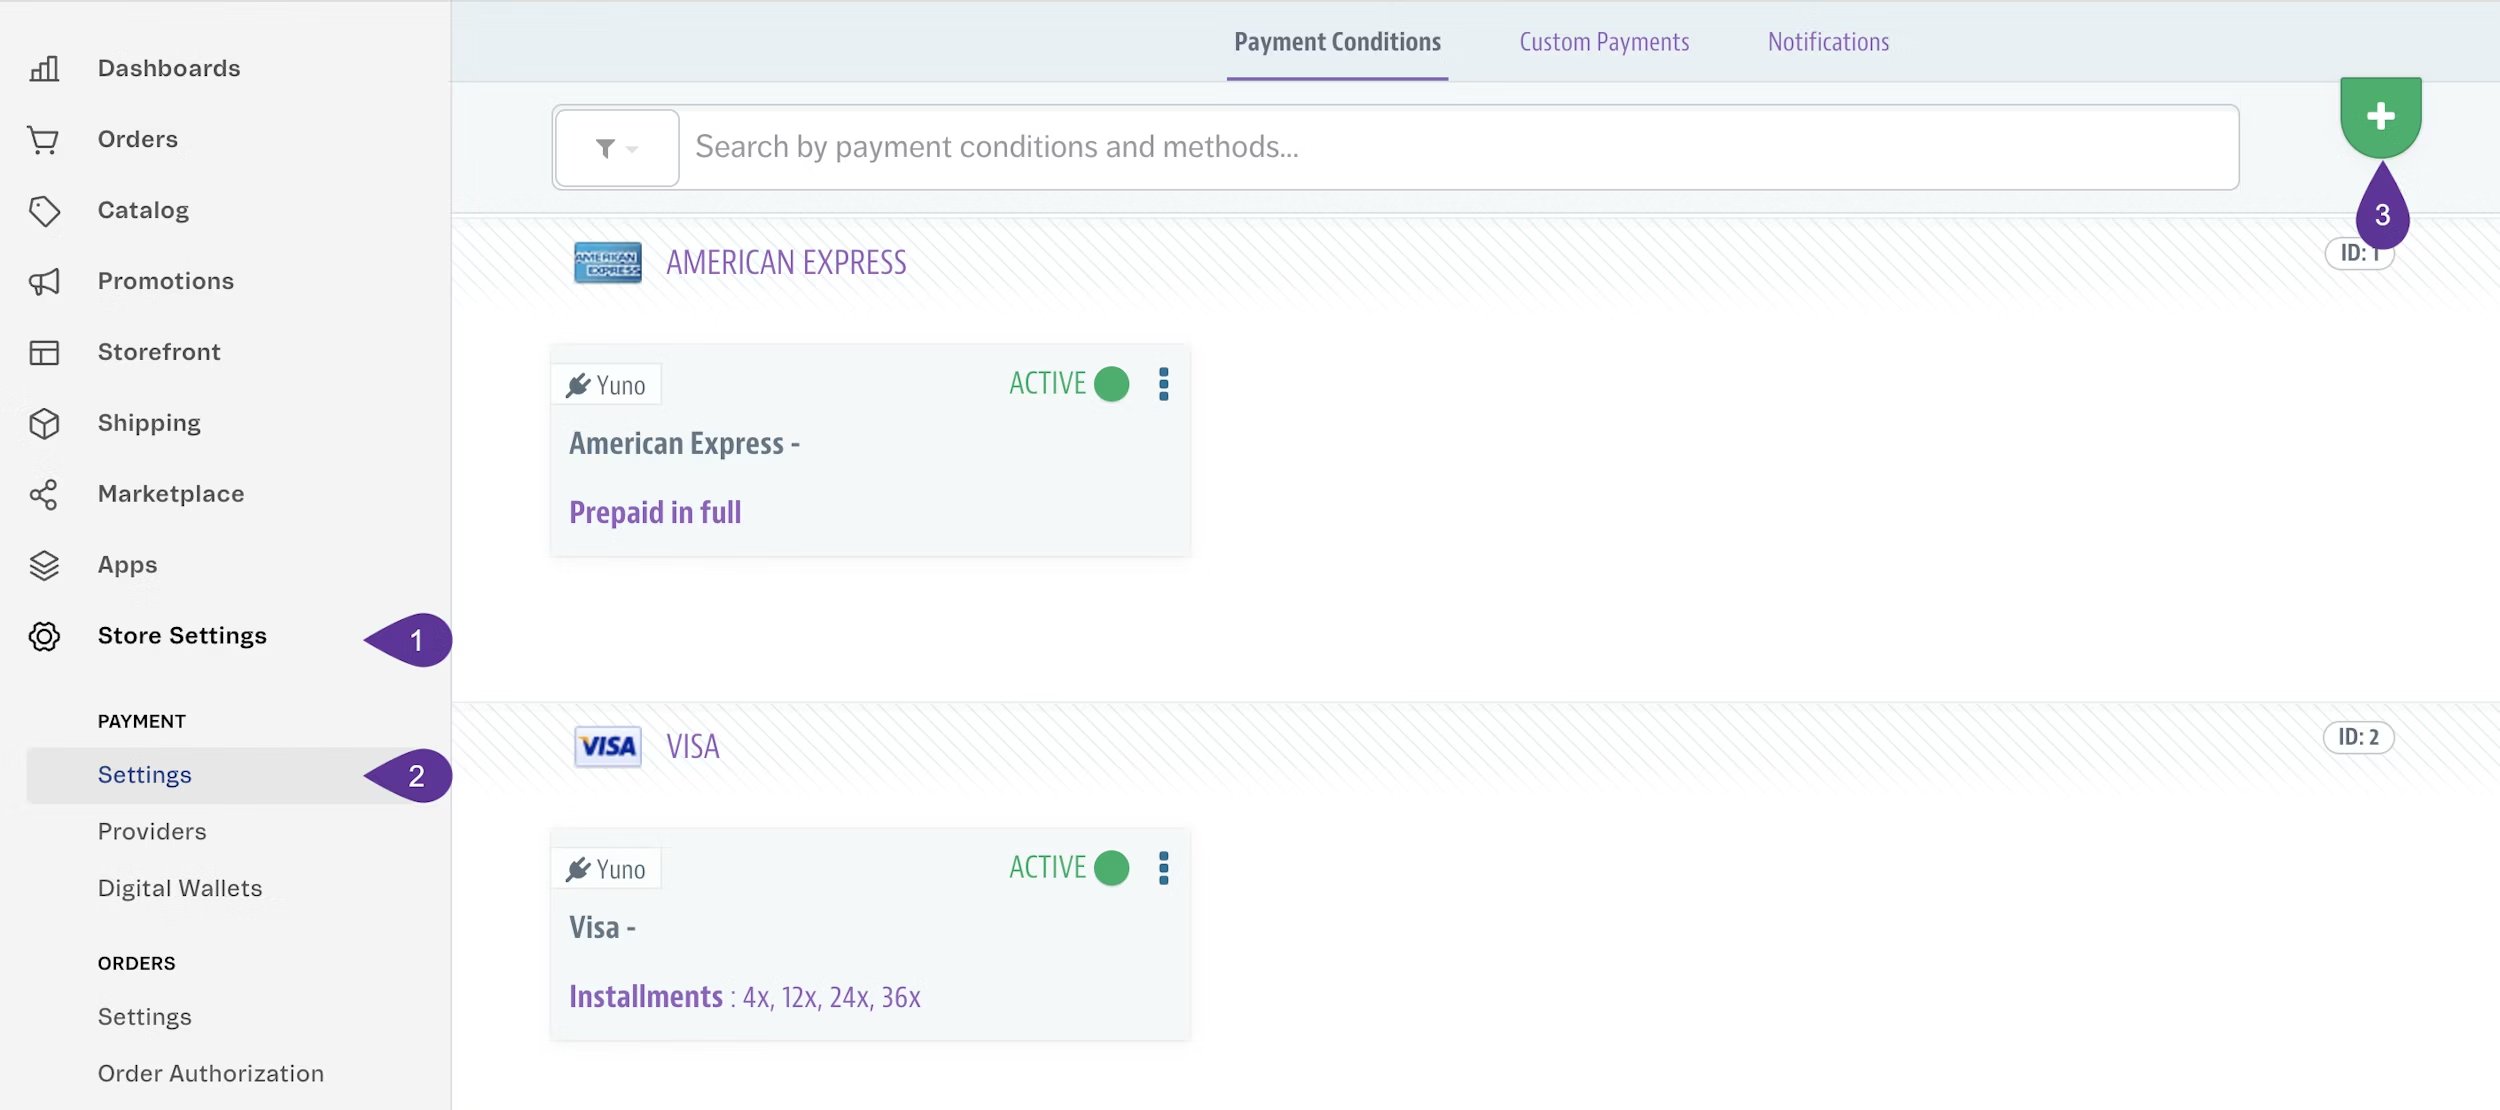
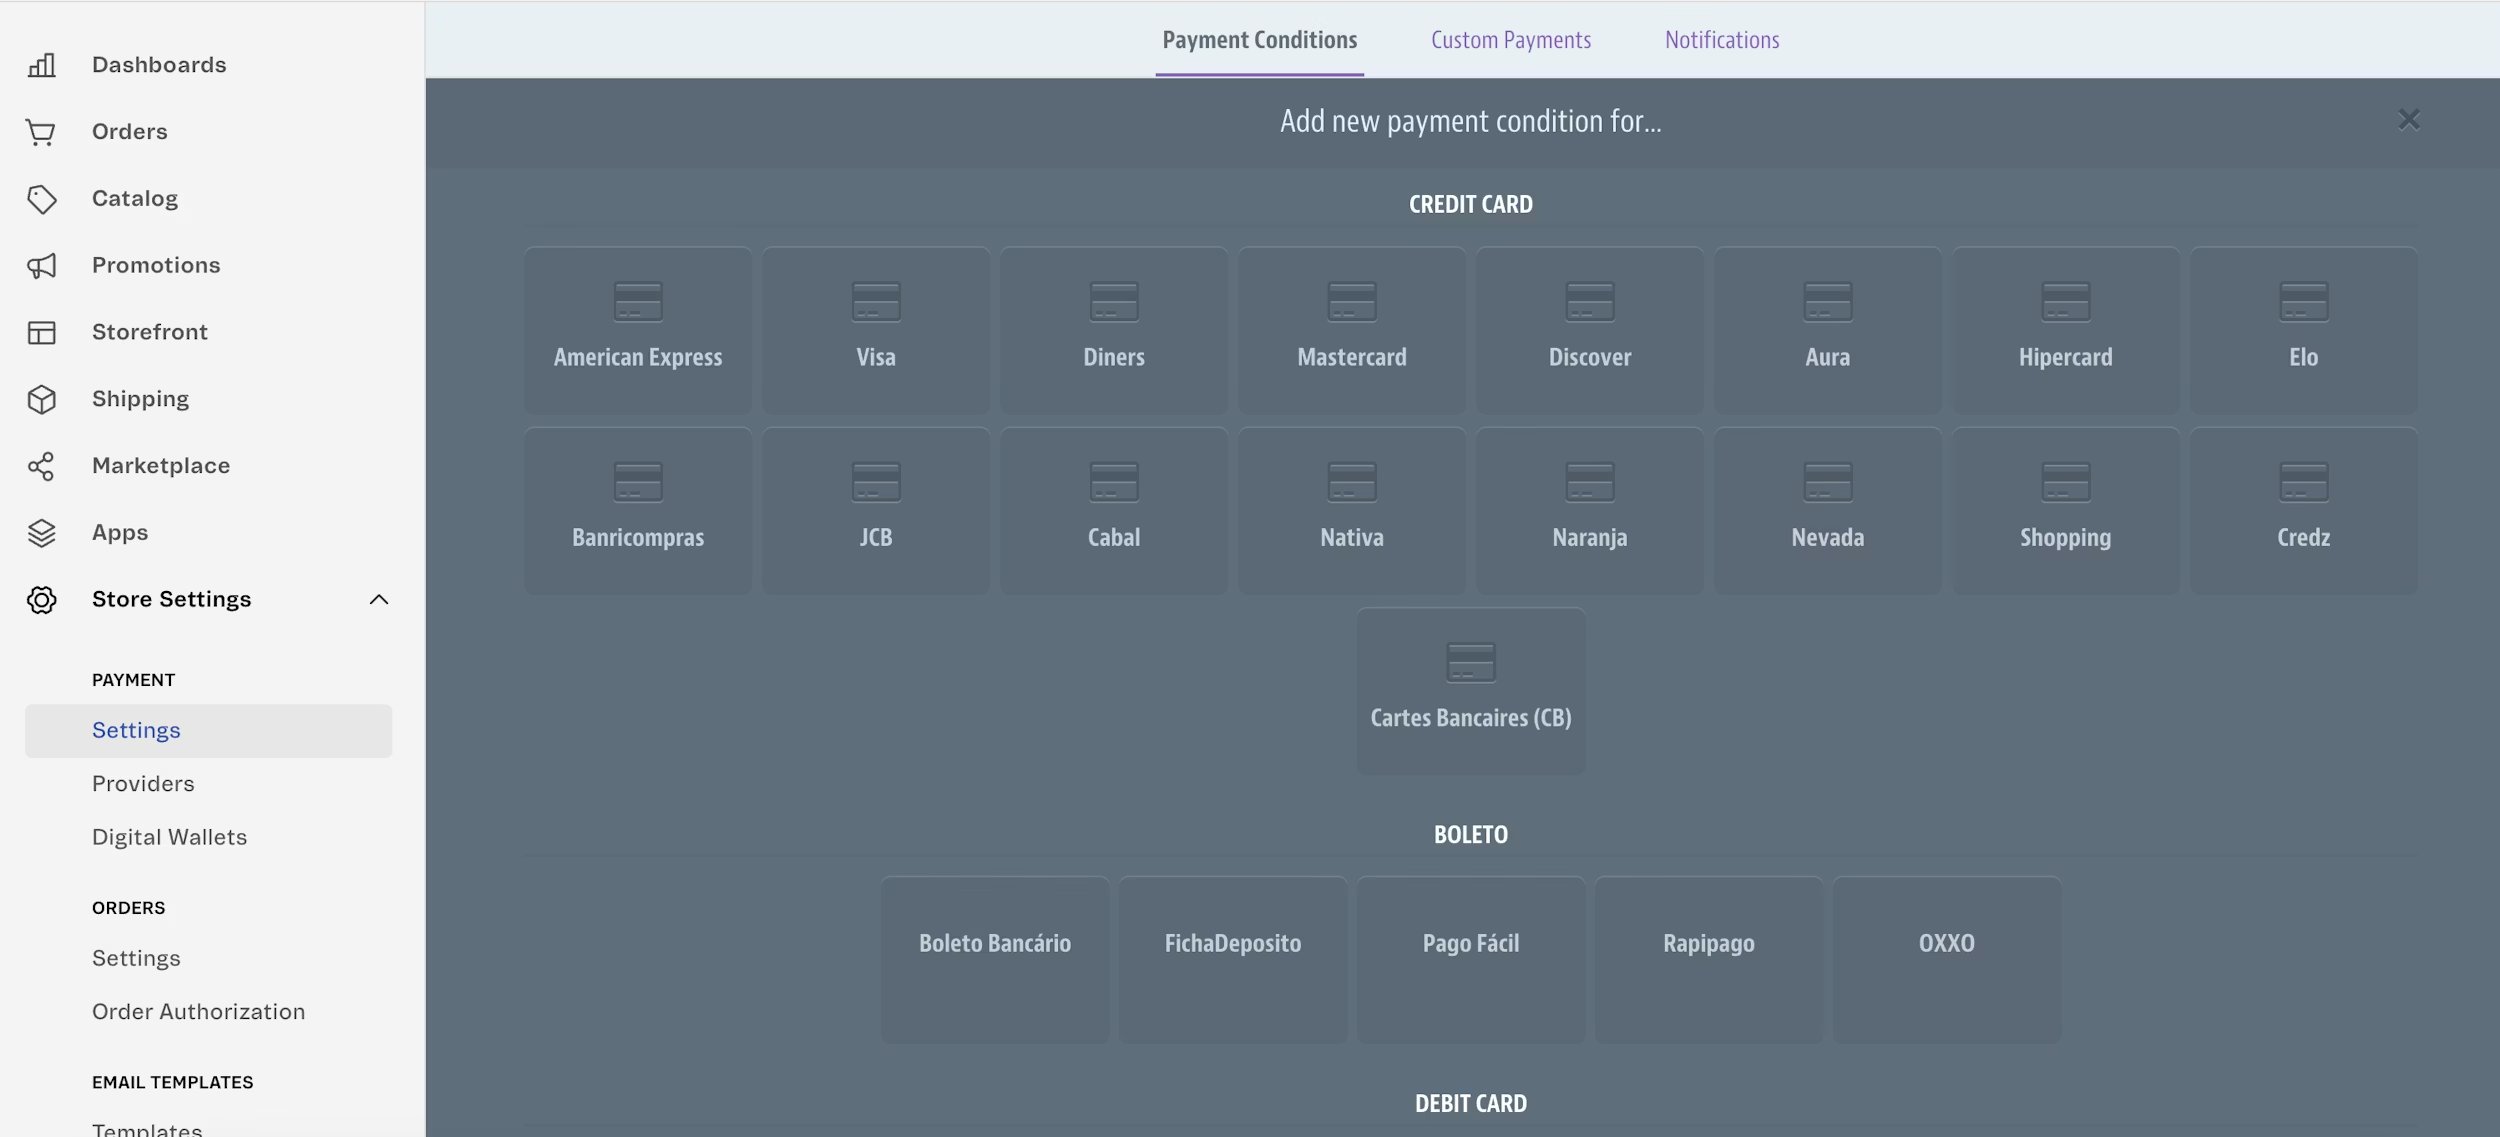

- In the VTEX dashboard, go to Store Settings → Payment → Settings → Payment Conditions. Click the + button to add a payment condition.
- Select the payment method you want to activate (for example, Visa, Mastercard, Pix, Apple Pay, or any of the Yuno * generic methods).
- In the Process with provider field, select the Yuno affiliation you configured in Step 1. Set the Status to Active and save.
Repeat for every method you want to offer. You can review the full list of available methods in the Overview page.
4
Configure the webhook in your Yuno dashboard
The webhook keeps your VTEX orders in sync with Yuno’s payment status updates.
- In the Yuno dashboard, open Developers → Webhooks and click Add webhook.
- Fill in the form:
- Name: For example
VTEX webhook. - Endpoint URL:
https://{store_name}.myvtex.com/_v/yunopartnerbr.yuno/v4/webhook, replacing{store_name}with your VTEX account name. - x-api-key and x-secret: Enter any placeholder value (e.g.,
VTEX).
- Name: For example
- Select all events and click Add.
Advanced Scenarios
Multi-affiliation
A single VTEX account can be connected to more than one Yuno integration when you need to process different payment methods through different Yuno accounts. For example, you can assign one Yuno account to credit cards and a different one to wallets. To set this up, repeat Step 1 once per integration, giving each one a distinct Affiliation Name. Then, when activating payment methods, use the Process with affiliation field to choose which account should process it.Multi-account
If your business runs multiple VTEX accounts (e.g., a franchise model sharing the same Yuno credentials), use the Main Account fields in the provider configuration:- Main Account Name: The name of the main VTEX account.
- Main Account App key and Main Account App token: Application credentials of that main account.